
WEEK 13.
How do Servos work?
Hello everybody and welcome to this new topic on Robotics. This week we are going to work on Servo Motors one of the most used motors in robotics. For today´s lesson you will read the article on this LINK. After you read this article please watch the videos below.
Our task for this lesson is to go to the Discussion board located on the blog underneath Electronics And Robotics 2 and make a comment on the questions that have been posted by the teacher. Please reply or make additional comments to this thread in different days. You will have full credit if you make a reply on this post on each day until next Monday?
WEEK 11
Microcontrollers.
| pic16f887.pdf |
class 3
Objective: Understand the importance of programming in a robotic System.
Watch the video tutorial on C for microcontrollers.
Watch the video tutorial on C for microcontrollers.
WEEK 10
Stepper motors.
WEEK 9
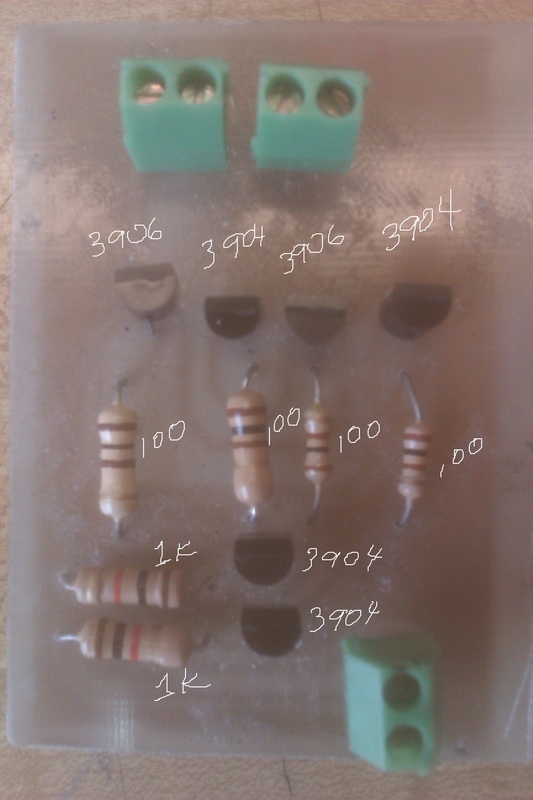
Creating the PBC for the H BRIDGE.
WEEK 8.
CLASS 1.
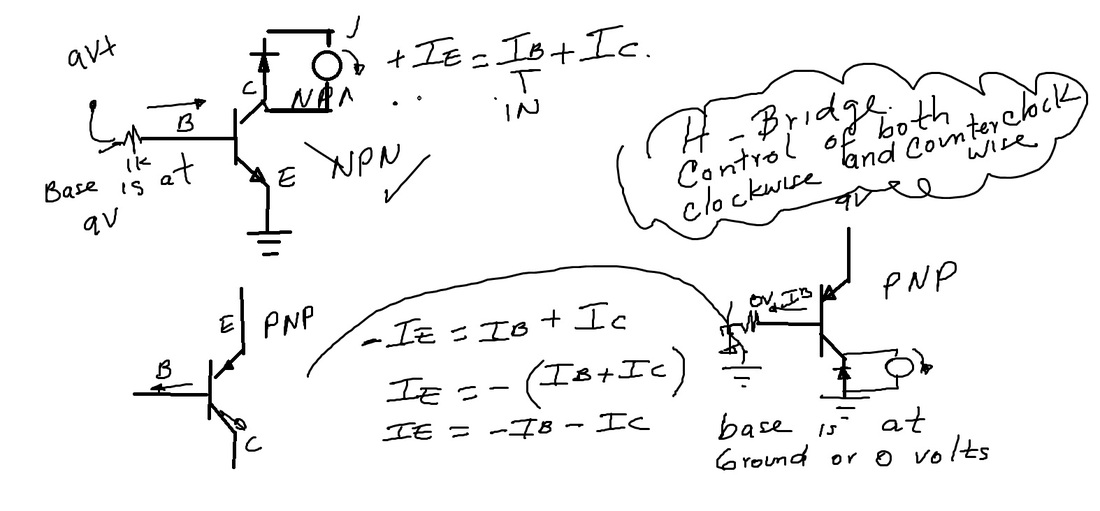
Objective: Analyze how the use of switches can alter the direction of how a DC motor spins and apply this concept using PNP transistors and NPN transistors.
Objective: Analyze how the use of switches can alter the direction of how a DC motor spins and apply this concept using PNP transistors and NPN transistors.
|
|
|
CLASS 2 and 3
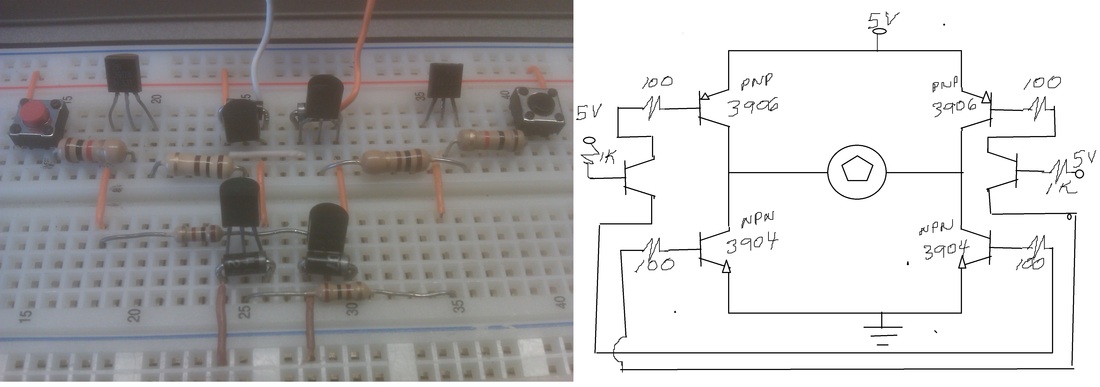
Objective: Apply concepts learned to implement an H Bridge on a DC motor to drive it clockwise or counter - clockwise.
- Look at the breadboard to analyze the real circuit and make an analogy with the schematic.
Objective: Apply concepts learned to implement an H Bridge on a DC motor to drive it clockwise or counter - clockwise.
- Look at the breadboard to analyze the real circuit and make an analogy with the schematic.
WEEK 7
THEORY OF TRANSISTORS.
WEEK 6
Objective: Understand the configuration and the application of semiconductors like: diodes, pnp transistors and npn transistors.
|
CLASS 1
|
|
WEEK 5
|
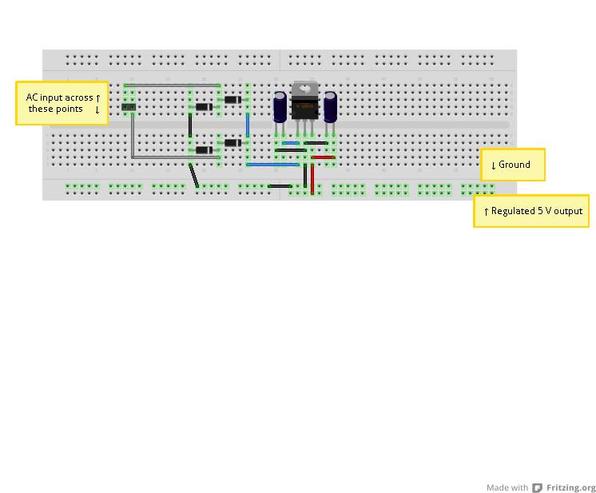
Objective: Students will build a full wave rectifier .
1. Understand how the positive and the negative fase of alternate current is converted into DC current through a full wave rectifier or a voltage bridge. (Lecture) 2. Assemble the circuit on the bread board using 9 volts AC and check for voltages on the DC motor. 3. Write 5 conclusions of your observations. 
|
|
WEEK 4.
Class 1.
Make a presentation using explain everything on the IPADS about what they learned on voltage transformers. Share with the class.
Make a presentation using explain everything on the IPADS about what they learned on voltage transformers. Share with the class.
|
Class 2.
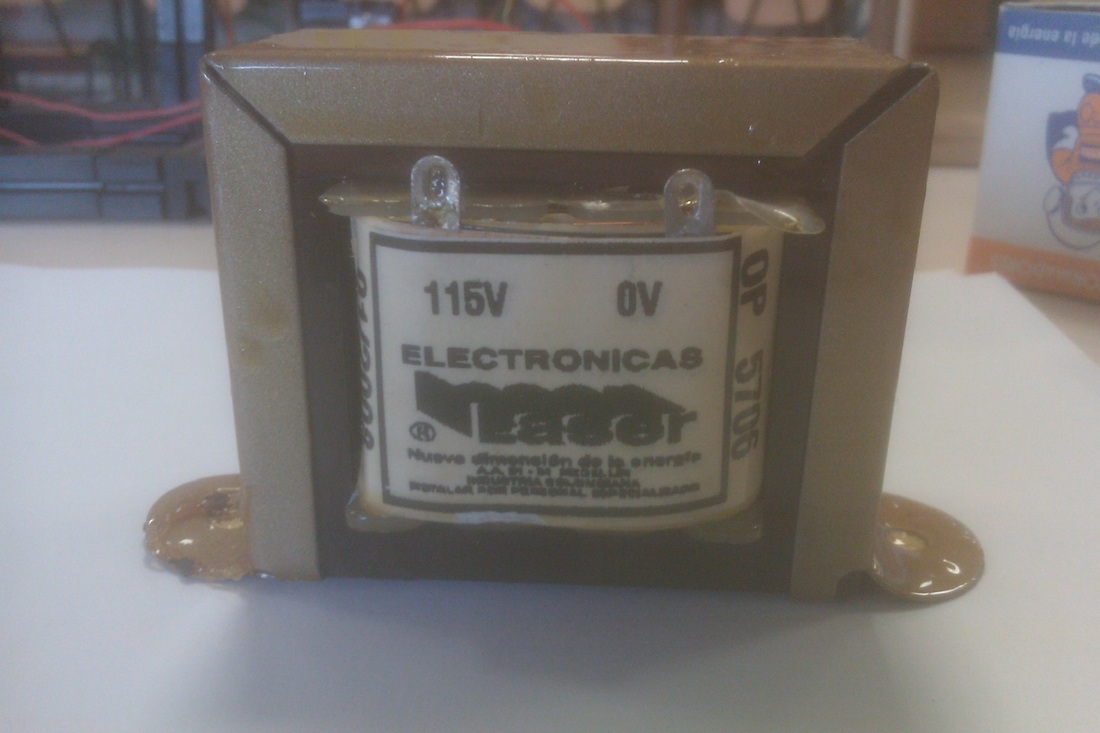
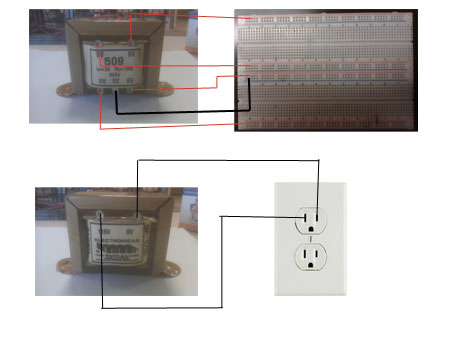
Objectives: 1. Students will identify each of the coil outputs of the transformer 509 and understand its basic connection. 2. Students will follow the steps for the lab workshop on transformers in order to make a correct connection. 3. Students will apply soldering techniques to attach copper wires to the transformer lids. VOLTAGE TRANSFORMER LAB 1. 1. Before you start your practice activity you should make a check list of the following.
2. Cut 7 wires about 15 cm each and strip them on both ends. 3. Solder the wires on each lid as shown on the picture. One side of the transformer is the input and the other side is the output with one common line 0. Make sure the wires are well attached to the lids and that there are no short circuits. You can use the voltmeter to check for short circuits. 4. Connect the input of the 509 to the outlet as shown and verify voltages. You have to make sure that the output wires are never touched because they will short circuit the secondary coil and damage the transformer completely. While you check secondary voltages you must assure that the others are isolated. Make sure your voltmeter is on AC remember that the transformer is a step down transformer and not a rectifier so it only reduces the voltage of the input. CLASS 3.
Students will build a half wave rectifier to move a 6V DC motor. 1. Make sure all the connections of the transformer are well soldered. 2. Look at the picture of the circuit and build it on a proboard. 3. Test the circuit and check for voltages DC on the motor and AC on the transformer. 4. Make conclusions of your results. What is the voltage DC on the motor. Is there any lost of power? 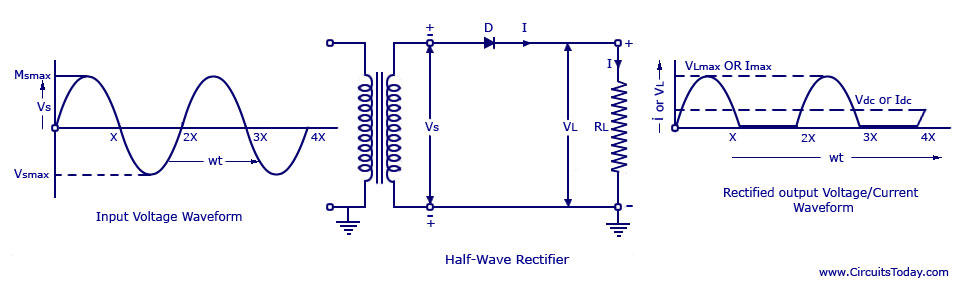
|

|
WEEK 3.
WEEK 2.CLASS 1.
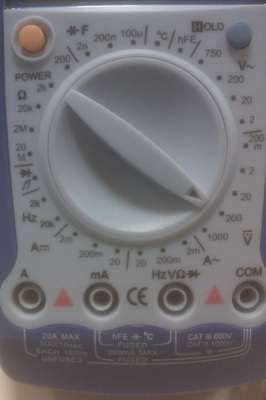
Students will learn how to use a voltmeter to measure voltage, current, impedance, capacitance, temperature, conductivity. First we will talk about the symbols that appear on the voltmeter and their meaning. Students will use the voltmeter to measure AC current and DC current on the modules. They will analyze possible solutions to undesired measurements. We will have a discussion on human errors and margin of error. |

|

|
ELECTRONICS AND ROBOTICS
|
